Monday, January 31, 2011

pretty storage for your bedding

if you are anything like me, you love all your storage- whether on display or tucked away, to be pretty.
when i open my drawers and cupboards, i want what i see, to make me smile ;)
i make a point of using floral boxes (that might have had a gift given in them) to hold all those things that don't need to be seen- notepaper, gift wrap, birthday cards.
i use pretty containers to separate clothing, pink tins and buckets to hold hair elastics, bathroom and laundry cleaners, ribbon tied and labelled wicker baskets for herbs and spices, and my newest storage idea- orphan pillowcases to hold my bedding.
i mostly like to use pillowcases in pairs, but i do have some lovely single ones that seem to just sit in the cupboard.
so why not use them to store that blanket, doona, quilt or throw that is not in use?
it will keep them dust free and makes you smile when you open the cupboard!
the cotton doona below is king sized and fits easily into a standard pillowcase. a great way to use and view pretty linen that was picked up from an op shop, or was a hand-me-down from nanna.
i found this tassled chenille beauty at a church garage sale for $5, and it fits perfectly into a pillowcase. when it's not being used, it can be thrown into the top of my walk in robe and not get covered in dust bunnies!


Pin It

Friday, January 28, 2011

my 1st win!

my 1st ever blog giveaway win!
i was so excited when this arrived in the post yesterday!
Jen over at "MADE BY GIRL" had a giveaway just before Christmas.
and i won one of 12 little posters!
Jen's blog is so colourful and inspiring. Head over and take a look.
it was wrapped and packaged so nicely for it's trip across the world.
i just love the colour, and love what it says! it's me to a tea!!

i found an old frame to pop it in. it's the perfect addition to the study- both in saying and colour co-ordination.
have you ever won a blog giveaway? if so, what did you win?
i'm off to make that coffee.....


Pin It

Wednesday, January 26, 2011

mirror display


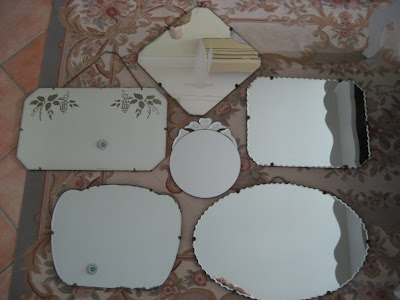
after finding the bevelled edge mirror with the pretty etched bird yesterday in an op shop for $8, i knew i finally had enough to do a wall display. i have been wanting to do this for years, but don't like to 'mix' my mirrors. what i mean is, the display had to consist of mirrors with a similiar edge- ie- all these have either a bevelled or pic crust edge. no actual frame.

i thought the 'rule' to hanging mirrors, or displaying anything for that matter, was to group items in odd numbers. so, when i first started to work on mirror positioning, i was working with 5 large vintage mirrors.

and it wasn't working!
so i grabbed the cutie off my daughter's wall and chucked it in the middle.
then it finally came together.

taking at least a couple of photos of your display on the floor helps to get them in the right place when transferring your 'design' to the wall. i measured out approximately how much room the display would need on the wall, then hung one at a time- starting with the diamond shaped one at the top, then referring back to my camera before hanging the next. i did it all without any man power too!

and here's the end result. yes, the A/C is cranking out the cold air on this super hot Australia Day!
we have enjoyed a quiet one at home. the day started with a sleep in for all, followed by a huge cooked breaky.


i also picked up this sweet $1 scrolly frame yesterday. i scratched through some old photos and found one to fit. i can't believe this photo of Emily and Kacey was taken over 8 years ago. my how the years fly past!

Pin It

Tuesday, January 25, 2011

the entry is done!


after almost 8 years in this house, i can finally say one room is officially completed! yay! of course some of the smaller decor will move around, but all in all, the entry is done. (that door takes you through to our study)

here's a breakdown of what is in the entry and the costs involved.

this chandelier was the final purchase and addition. i found it when flicking through a 'Home Beautiful' mag last year, and decided it was perfect for the entry. it is from Beacon Lighting and was on special for $89.95.

the birdie was about $10 from a garden shop. the twine a couple of dollars from Bunnings.

i've had this resin frame for years. a $6 cheapie from Target. i added the fabic.

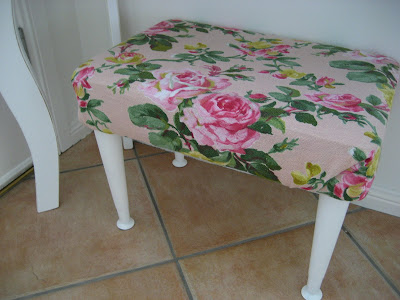
you are probably getting tired of seeing this stool! it is happy here at the front door and adds a pop of colour. it was a $3 market find and the fabric used to cover it was about a dollar.

these 3 frames were originally bright yellow with country pics. i revamped them with some white paint, a light sand and some fabric.

this side of the entry looks through to the formal lounge room. the walls have been painted in Antique White USA.
the lamps you can see through there were also markets finds- $5 each.

the table was an eBay purchase for about $70 and came with the cut glass knobs. i have recently repainted it white to freshen it up. the mat at the door was an Ikea find at $4. i bought 2 so that one can be washed/soaked while using the other.

and lastly, the mirror. the most exy piece at $150. a birthday pressie years ago.

so there you have it. an entry complete, and not done on a huge budget at all.
i think it pays off to buy pieces over time, rather than jumping in and buying everything at once. it gives you a chance to work out what you really love.

i have a few other rooms that are almost complete. i'll share those as they are finished too!


Pin It

Saturday, January 22, 2011

HUGE blackboard


here's my finished blackboard i promised i'd show to you. um, it was meant to be for the girls, but i'm kinda liking it for my own "list of things to do"!!

i had originally stapled foam and fabric to this mdf and hung it above our bed as a feature. i tired of this pretty quickly (fairly normal for me!) and decided it would make a fabulous blackboard.

once the fabric and foam was removed, i sprayed the mdf with blackboard paint left over from my previous smaller blackboard project.

i then purchased a tin of Dulux blackboard paint and gave it 2 more coats with a brush. White Knight also does it in a tin, but washing up has to be done in turps as it's oil based paint. The Dulux version is water based- made it an easy decision for me, as i hate washing up in turps!

i then left it to dry for a couple of hours, and rubbed it over with chalk. this helps to make writing and drawing a little smoother.


my trusty staple gun helped get it back into the frame.

i had the chalk in an old jar,

but think i favour the chalk sitting in this soft pink mini bucket.

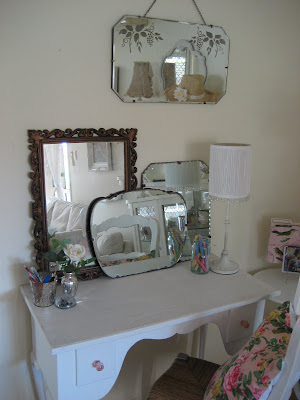
i started with an array of mirrors on my desk,

coupled with some mercury glass items.

but, as usual, i change my mind without even meaning to.
my little artists are busting to have a draw on it, so i'll move it temporarily to the floor for them.

i've decided the blackboard is more practical than the mirrors, and being a "list" person myself, it makes more sense for it to live right here ;)

linked up with Funky Junk Interiors
Pin It

Wednesday, January 19, 2011

so thankful

over the last week or so we have been bombarded with the awful news and images of what the rain and flood waters have done across Queensland. and now it seems to be Victoria's turn.
we live on the north side of Brisbane, about 20 minutes from the city and have not been directly affected by the flooding at all. and i'm feeling so thankful. so grateful. so blessed.
whenever i walk through the door into our home, i see this blackboard, and am reminded immediately of all we have, and all that others have lost.
and the generosity of Australians, both through time and donations, is truly overwhelmingly wonderful.
it is a good time to sit back and think about how we can give to those who have less than us. and the perfect opportunity to look around us at what we would normally take for granted.
as a family, we plan to use this blackboard for quotes that inspire us, and for small words of encouragement. my younger daughter has decided she would like a larger blackboard, so i'm working on one :) halfway finished. just need more blackboard paint!
i'll show you when i'm done....


Pin It

Friday, January 14, 2011

i heart mirrors


welcome to SOME of my mirror collection. yes, i have an embarrassing number throughout the house. i didn't photograph all of them, but you get the idea.

i can't even say that these are my favourites, as i love them all for different reasons. the one up the top was a birthday pressie from Mike many years ago.

the one below has a twin that now lives at my friend and market buddy Stephenie's. we nearly hyperventilated when we found them at a deceased estate sale. it might get painted one day, but for now i love the colour. such pretty detail. they just don't make them like this anymore.

this cutie is in Em's room. $5 from the markets. venetian mirrors with all their etching and bevelled edges get me everytime.
i went through a 'cherub' stage and picked this up for $3. the girls fight over whose turn it is to have it in their bedroom. mirrors never hang in the same place for long :)

ok, so i don't really have a place for these at the moment, but i love to overlap them and have them sitting together. the one in the middle is the newest addition to the mirror family. i was handing some stuff in to the local Vinnie's and there it was. just waiting for me. i didn't need it, but for $5 it wasn't staying behind.

and it's not always all about mirrors. i love things with mirrored surfaces. the sweet little dish was $3 and i picked it up at the same time from Vinnie's too.
mercury glass items make me 'gasp and grab' too. can't leave them behind either! the little pots below are great for a few flowers out of the garden or for pens and pencils. i might have to move Mr Fish somewhere else, as i plan to sit in this little nook when i start some more study this year.

having so many mirrors around helps lighten up our living areas, and helps them appear larger. and i just love that. even if it does shows up a random floating balloon.

old pie crust edged pieces. love.

mercury glass candlesticks. my mum-in-law knows me well and got these for my birthday one year.

sometimes the actual mirror is hazy with age. don't care.

mirrored frame with fabric. love the age to this one. it came with an original picture of 'the last supper' which still in the back. not quite right for my decor, but wouldn't throw it out.

i gave this one the mosaic treatment using old saucers.

this little one came from my Grandparents place. it reflects the old clock which also came from their place.

again, this shows SOME of my mirrored photo frame collection. yes, you're probably right if you are now starting to think i have a problem ;)

last but not least, a pretty mirror with loads of scrolls. i painted it up and it set me back a whopping $1. i think it was this beauty that got me hooked in the first place! i do sell alot of stuff on eBay, but you are unlikely to see mirrors for sale.

what's your obsession? or do you have more than one like me!!?

Pin It

Tuesday, January 11, 2011

make cushions while the rain falls

we've all heard the term "make hay while the sun shines" well i've altered that 'saying' slightly as you can see from my post title!

the weather we are currently experiencing in Brisbane is nothing short of bizarre. flash flooding, evacuation warnings, sandbags along the Brisbane River and underground carparks in the city and suburbs close to the city cleared. The deluge (reportedly the size of Sydney Harbour) that has inundated Toowoomba is headed our way. And our dams, rivers and creeks are already full. Roads are pot hole filled and closed in many areas. Today, the 11th January 2011 will be a telling day for the South East of Queensland. Drought one day, flooding the next!

So, the school shoe shopping has been put on hold, as has a trip to Seaworld and a visit to the Sunshine Coast. The 30+ Olay face moisturiser has been pushed to the back of the bathroom drawer, as night cream will do the job. No sun to be seen!

And I was able to cross another fun task off my holiday list: making some cushion covers- from the most delicious vintage fabric I have ever come across! (so far anyway :)
I even made little ties at the bottom.

i had to take photos right near the windows as the light is terrible at the moment.

i backed them with white linen napkins. that helped get them nice and square too.

you may remember this little stool from a previous post. it's also covered in this yummy rose fabric. sadly it's all used up now :(

now it's time to cross off a not so fun task- the ironing.....

what have you been keeping yourself busy with these holidays?
Pin It